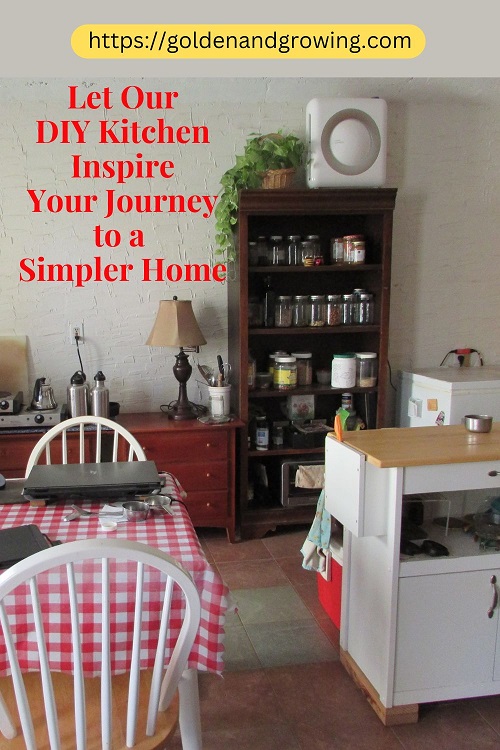
If you’re finishing out a home yourself, a DIY kitchen doesn’t have to mean building cabinets and countertops. Here’s what we did to make our home more simple.
The story.
“Why don’t we use them for kitchen storage?” I asked my husband. “We can put all the dishes in the drawers, have the two-burner stove on top, and you don’t have to worry about building cabinets.”
I was talking about the two nightstands, more like mini-chests of drawers, my husband had brought into our marriage. They used to house our son’s clothing, but his wardrobe was so small now. I figured we could buy a few inexpensive canvas totes for him to use to store his clothes.
My husband was agreeable. When all was said and done, the only thing we ended up buying for kitchen storage and counter space was a three-hundred-dollar utility cart from Amazon.
Why we chose a DIY kitchen.
When we had our earth-sheltered house built, my husband had been out of the rat race for almost two years and we didn’t know how far our nest egg would stretch.
So the decision to finish it out ourselves was a no-brainer… if not the least stressful option we might have chosen.
As it happens, our new house was much too small to spread out all our remaining furniture in the usual way. So we repurposed some of it, incorporating the pieces into the kitchen.
Here’s a look at not only those, but the entirety of our improvised kitchen. I offer it to you not because I think you should emulate it, but to inspire you to consider ways you can simplify your home.
Everything including the kitchen sink.
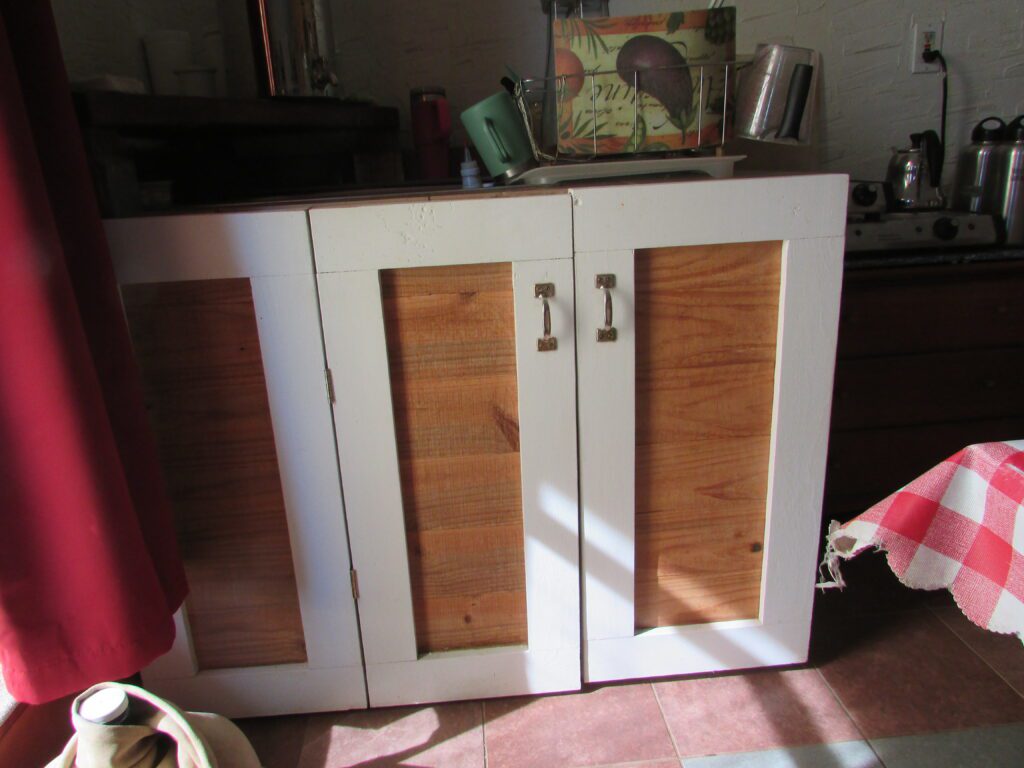
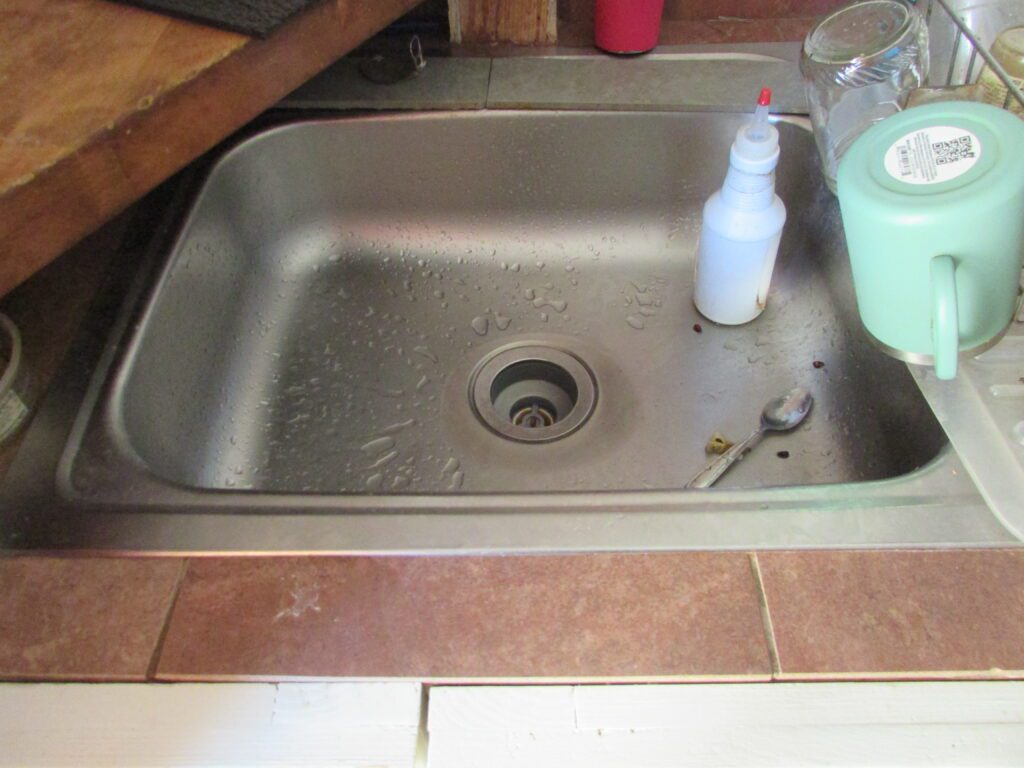
We are off the water grid, and our house is not plumbed. More on that in a future post. So for a while, our kitchen sink set-up was pretty darn primitive.
When my autistic brain, which can’t stand visual clutter, had had enough of its ugliness, my husband built a sink cabinet almost completely from scrap wood and tile from the other house-finishing-out projects. We found the single sink we wanted from Lowes, my husband measured and cut accordingly, and I finally had not only a real sink, but a stable place to put the dish-draining rack.
The one major piece we eventually had to buy was a piece of butcher block for the Berkey spigot container to sit on.
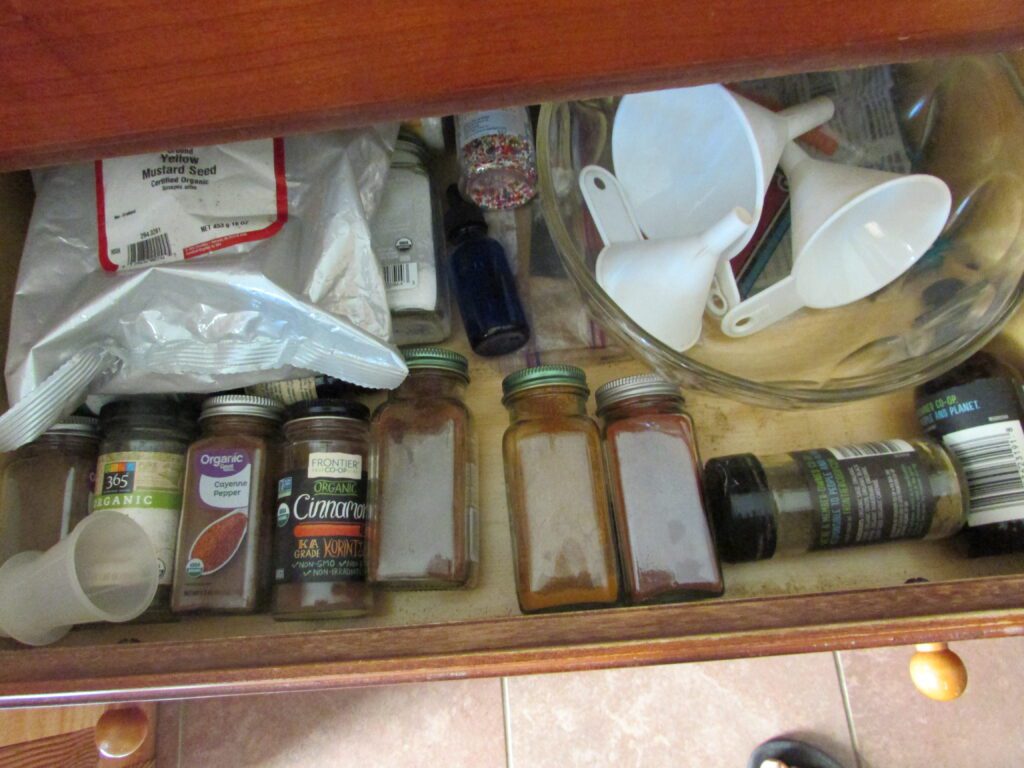
Our DIY kitchen nightstand-cabinets.
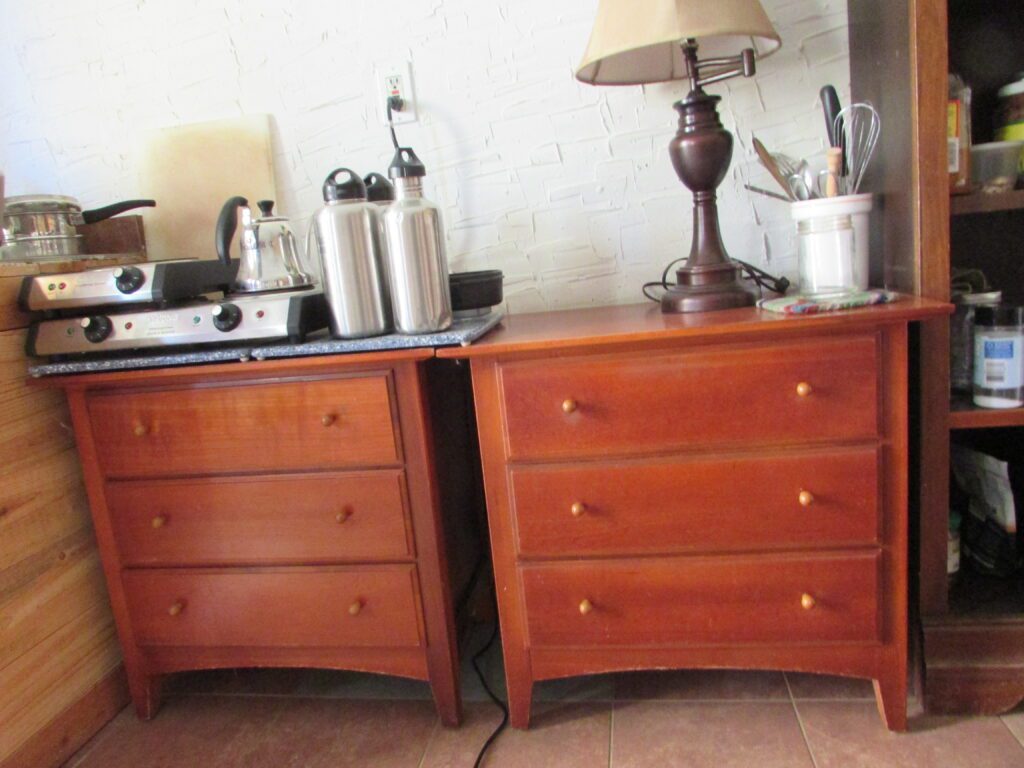
The above photo shows the nightstands I mentioned in the introductory story. We had two countertop samples from a remodel in our suburban home, so I set the two-burner stove and stainless steel water bottles on top of them. To the right is a lamp, plus a decorative container for the larger kitchen utensils.
The left-hand nightstand, from top drawer to bottom, contains:
- My husband’s tea things and a few other of his miscellaneous items.
- The spices plus one salad bowl and a funnel set.
- Storage bags.
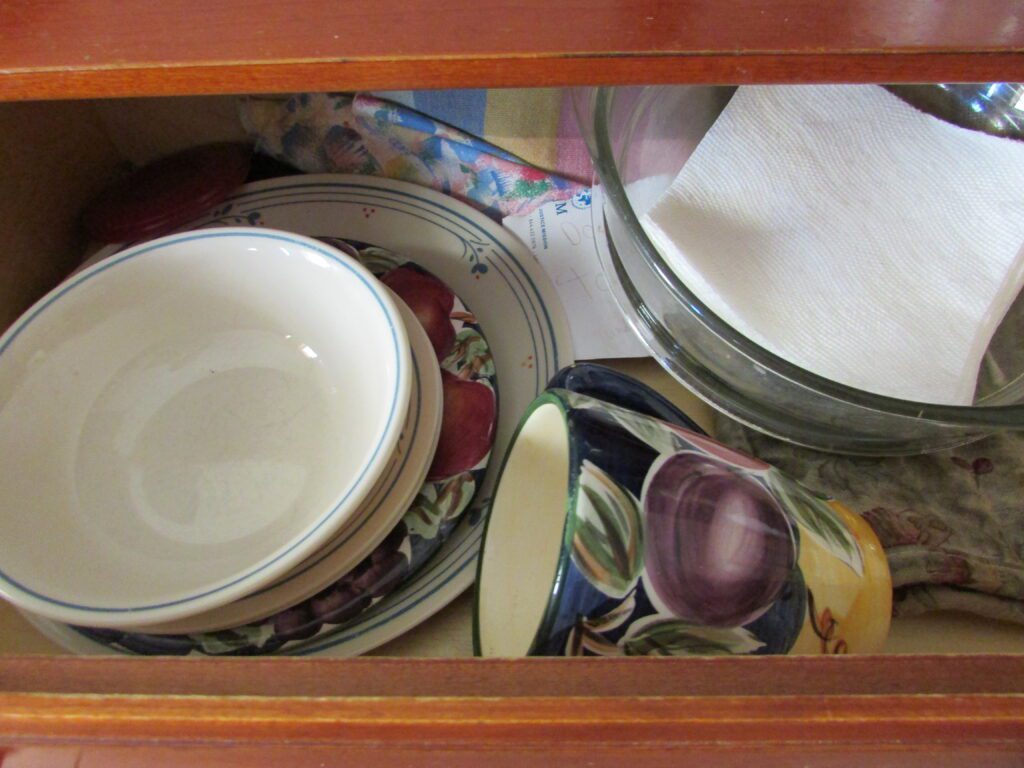
In the right-hand nightstand:
- A few dishes.
- Miscellaneous items that probably should mostly be tossed since I hardly ever open that drawer.
- Plastic and glass food storage containers, plus two clean kitchen towels.
This set-up was a royal pain the year that I injured my lower back and left glute, as it was months before I could safely bend over. In the meantime, I had my husband move the most frequently used plastic storage containers to the pantry shelf. They’re still there now, and may remain there because they’re a heckuva lot easier to grab!
Speaking of the pantry shelf…
Our DIY kitchen pantry.
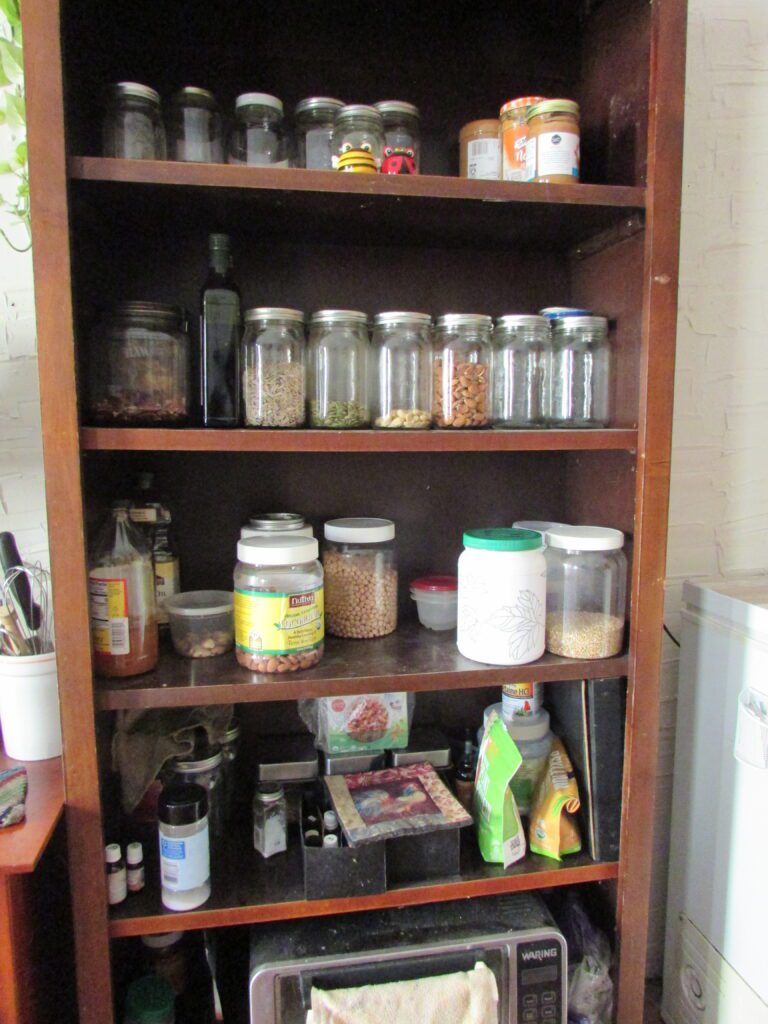
As I discussed in this post about things I did to simplify my home, we didn’t need three bookcases in the living room area (really didn’t have room for them). And I wanted to save my husband as much work as possible, as he’d just completed the major interior work on the house: interior walls, tile floor, windows, etc.
So I said, “I know! Let’s use one of the bookcases as an open pantry!”
It houses a fraction of the non-perishable goods in canning jars and repurposed plastic containers. Most of the bulk nuts, seeds, grains, and beans live underneath our high-platform bed in air-tight buckets. A few canned goods, condiments, and protein powder are in the loft above the bathroom, adjacent to our bedroom. They’re within easy reach on the infrequent occasions we need one, and would otherwise clog the shelves.
Our small toaster-convection-mini-oven lives on the bottom shelf of the bookcase, as, at the present moment, I rarely use it. And if I ever did begin to use it regularly, it wouldn’t be more than once a week, so it would still live there most of the time.
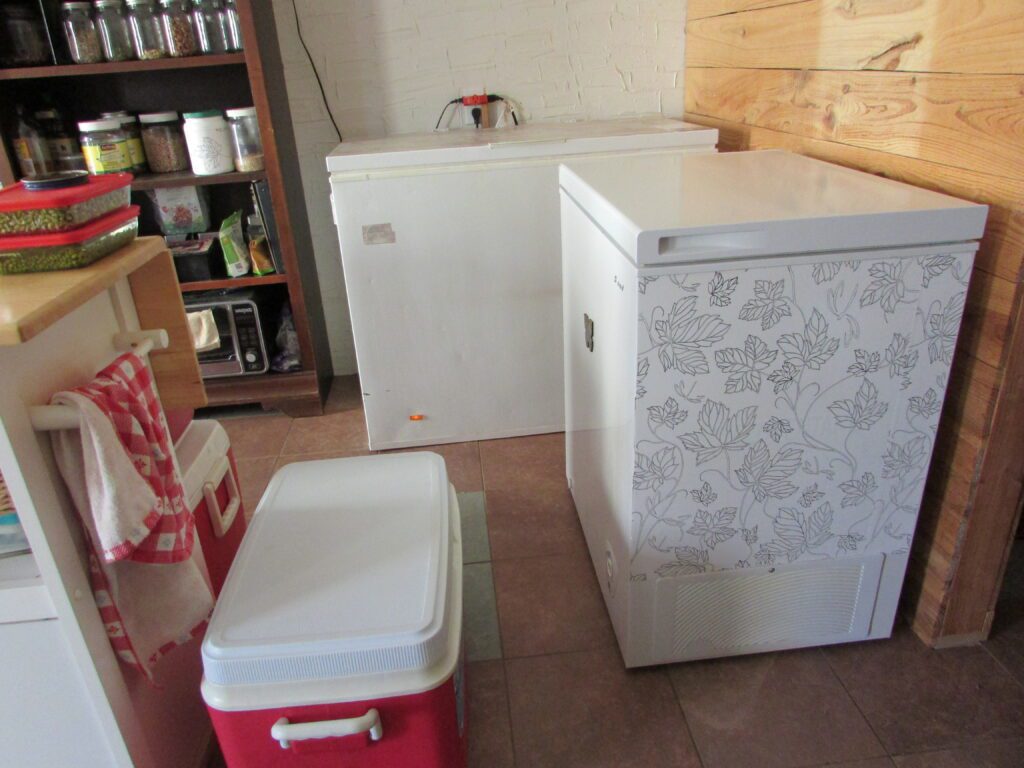
Our DIY kitchen is missing something…
Here is a photo of the part of our DIY kitchen that lines up against the west wall. The freezers are both against the wall that separates the Great Room from our bedroom. What don’t you see there that most modern kitchens have?
I’ll give you a minute.
[Waiting, waiting…]
Do you see it? I should say, not see it?
If you said, “Refrigerator!”, give yourself $5,000 and a trip to Fiji!
We don’t own a refrigerator. Instead, we have two freezers and four forty-eight-quart coolers. Every morning, we take five minutes to switch out the ice from the big freezer. It took some experimenting and a bit of moldy food, but I finally figured out how much ice was needed to keep a cooler at refrigerator temps for twenty-four hours (about two gallons worth).
Again, using coolers wasn’t fun during my injury recovery, but every time we have a power outage – though they be infrequent – I’m glad we have this improvised set-up. A chest freezer stays cold much longer than a refrigerator (even a chest one) when the electricity is out. And we can use our generator to focus on keeping the freezers running.
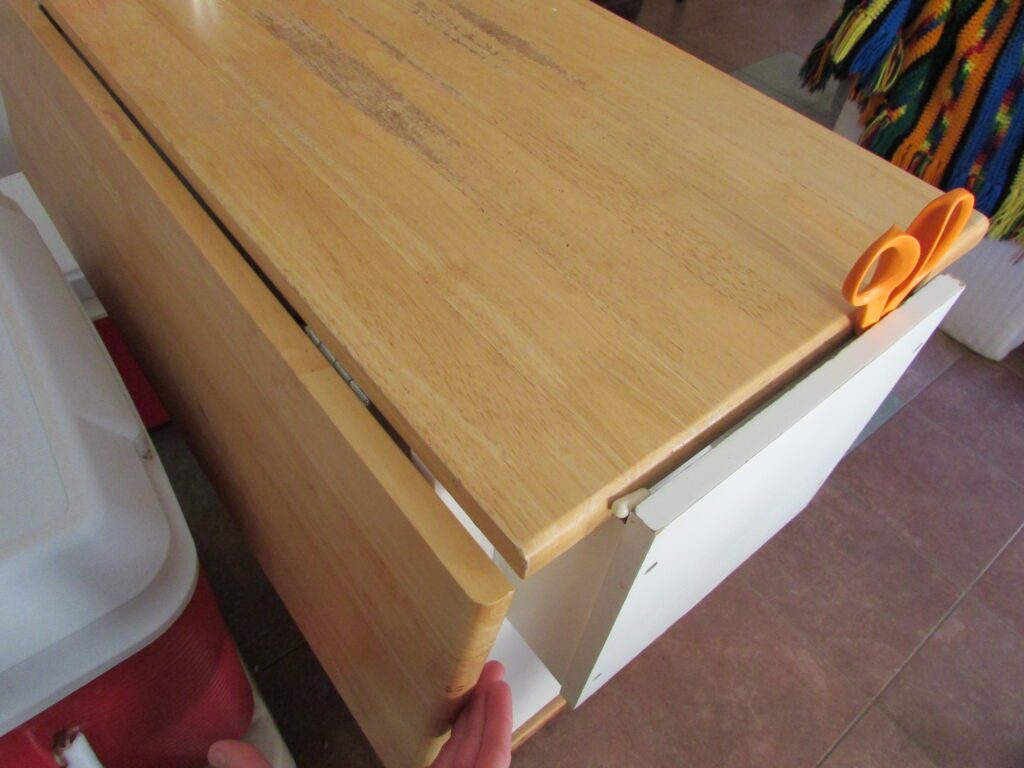
Our one big purchase for our DIY kitchen.
While waiting for our earth-sheltered house to be built, we lived in a 192-square-foot shed with a loft. Talk about cramped!
One of the important lessons I learned early on during those twenty-one months was not to use a freezer lid as a counter. Especially not for placing a cutting board on and cutting frozen bananas.
Despite the lack of space, I insisted we buy a kitchen utility cart.
It changed my food-prep life. It not only gave me extra counter space, but also extra storage space.
That’s not to mention a drawer for the eating utensils – hooray!
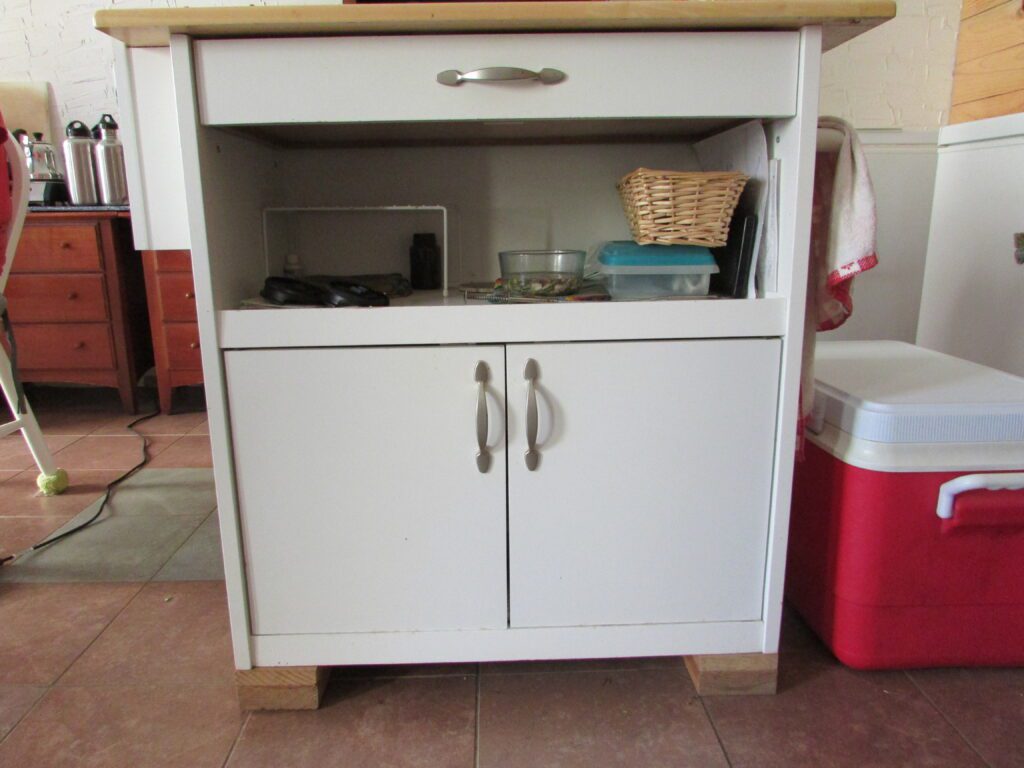
In our DIY kitchen, I use the open space beneath the drawer for soaking nuts and seeds for smoothies, and to store small things like twist ties and toothpicks.
The cabinet space has gone through a couple of declutters and iterations. I finally added a shoe organizer shelf that we were no longer using for shoes in order to use vertical space to store a variety of smaller objects.
Tradeoffs for going rogue.
A lot of neurodivergent people would look at our DIY kitchen and think, “That would drive me crazy!”
On my low days, I think that, too. Sometimes I even start talking about remodeling the space.
But though I have to occasionally dust the items in the open pantry, I’ve fixed it up so it’s decorative. I also always know what we have on hand.
In the past, I’ve had two refrigerators die on me, and it’s no fun waiting to get a new one delivered.
It would be worse where we live now.
And then there are the occasional power outages.
Yes, our “stove” is a bit lower than is perfectly comfortable, but we don’t use it that much, and we’re used to it.
And even though the finishes of the nightstands and the pantry bookshelf clash, it’s not the same-old, same-old modern kitchen. If it consisted of the usual counters and cabinets, I’d get pretty bored looking at it from where I sit in my rocking chair in the living room. As it is, it’s an attractive, eclectic view.
And I like the open wall space above.
There are certainly downsides to our DIY kitchen, but as I mentioned earlier, I’m not writing this post to give you a blueprint for the perfect simple kitchen.
Not hardly.
Instead, I hope it will inspire you to think outside of the box when it comes to reaching for greater simplicity in the function and design of your home.
P.S. – If anyone is still worried about it, our son now has a set of drawers for his clothes.